

My little one is off from school on Tuesdays and Thursdays so we got to spend some time yesterday whipping up these fun and festive cupcakes. I do have to warn you though - if you have really strong feelings against food coloring, you may want to stop reading now.
Can't say I didn't warn you!
Normally I bake from scratch including the cake and the icing, but for this little project I just made it easy and used both a box mix and a ready made frosting.
I was inspired to make these because the other day when I was in Target, I found all these fun red, white and blue toppings...
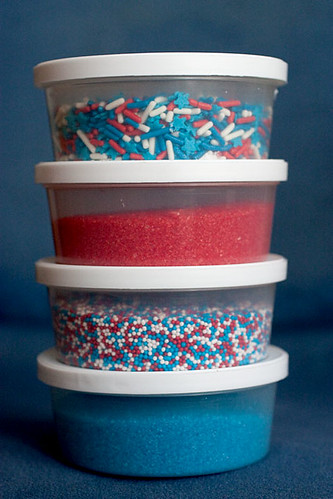
How could you not be inspired?!?
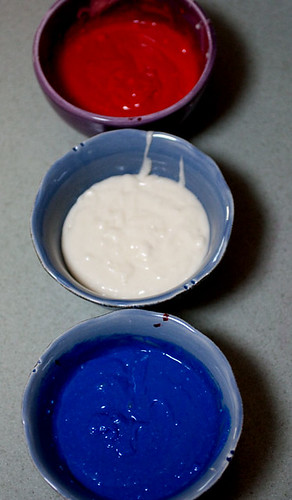
So, I started off with a WHITE cake mix. Use whatever brand you prefer. I even made it with only egg whites to make sure I kept the white color pure.
Besides the toppings being red, white and blue, I wanted the inside of the cupcake to be colorful as well. This is where the food coloring comes to play. If you are that adamant about it, you can always skip this step and keep the cupcakes white. Your choice.
Follow the directions on the box and then separate the batter into 3 equal parts. I used gel food coloring to get the red and the blue you see here.
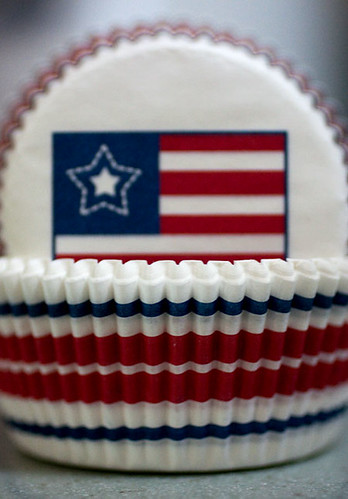
I found these patriotic cupcake liners at Michael's.
Pop them in the pan and then start with the blue batter. I used about a tablespoonful.
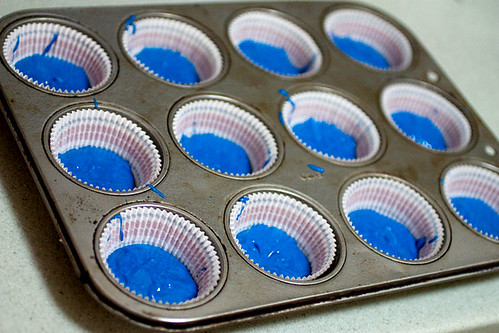
Next came the white. You just want to make sure there's no blue peeking through.
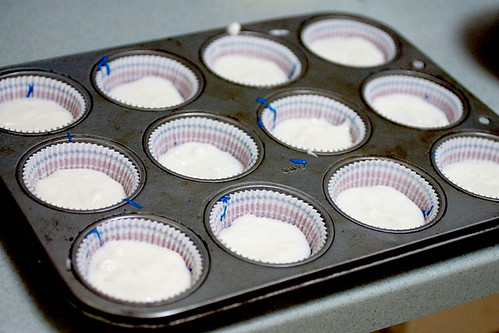
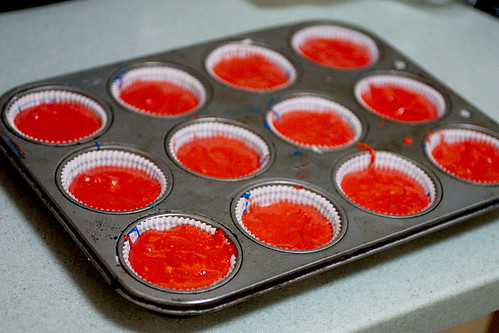
Then finish up with the red.
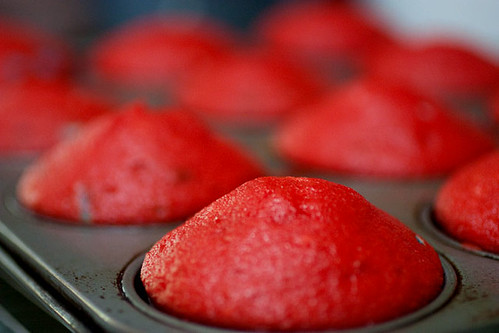
Bake it in the oven, again following the directions on the box and then when it's ready you have these lovely red mounds.
But when you cut it open, you have this...
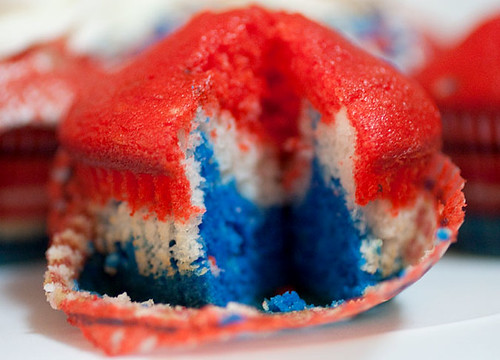
So cool, right?!?
Next it's time to decorate.
My little one really got into this part.

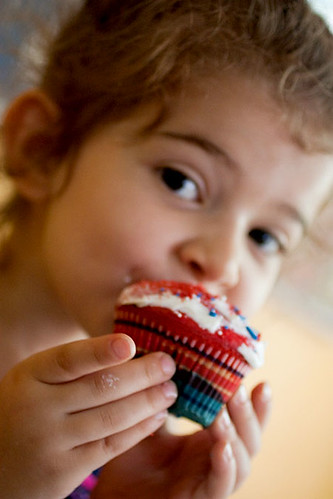
Great Job!
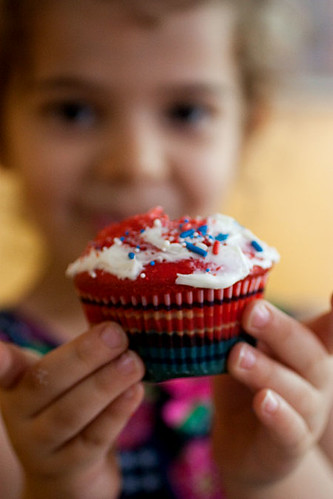
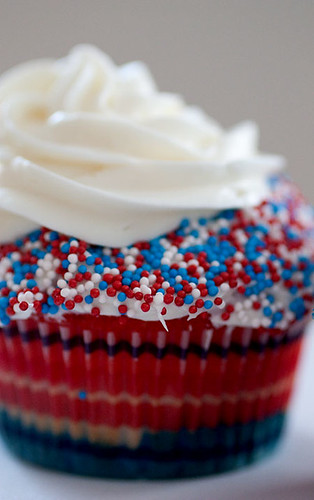
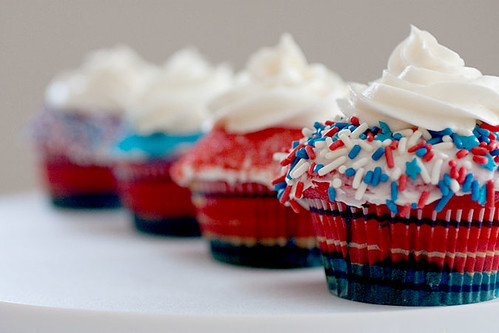
I made 4 different versions - each one just slightly different. I wanted the edges to have the special decorations - sprinkles

If you look close you'll see they even have little stars in there...

non-parells,
and colored sanding sugar.


Then each center was topped with a swirl of white icing.
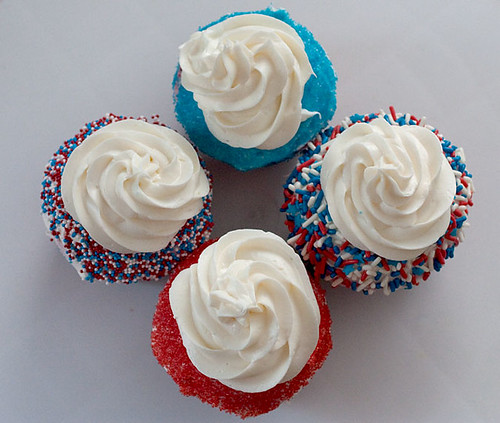
So festive!
But wait, they would look so much better with cupcake toppers...
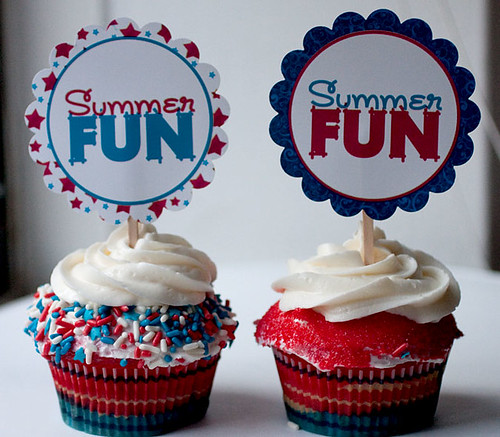
Now that's a celebration!
I designed these on my computer and used a 3 inch scalloped edge punch to cut them out and attach to a pick. I prefer the 3 inch to the 2 inch size. I think it makes more of a statement. FUN!!!
Let me know if you end up trying these or any other fun desserts for the upcoming holiday. If you'd like to use the same cupcake toppers I used here, you can dowload the PDF for free!! Just click here.
Enjoy!


3 comments:
i love these ! thanks for the great idea <3 i'll have to try them this weekend .
Hey Cassidy, Let us know how it goes if you try them out. Would love ot hear from you!
Amazing! I am so making these for Independence day.
Post a Comment