

My daughter requested (more like demanded) that I bake something for her class for the last full day of school last Friday. I've done a bunch of different cupcakes throughout the year so I wanted to try something that would still be fun, yet a bit different. Since I'm an avid reader and fan of Bakerella, I thought I'd try my hand at cake pops.
If you're not familiar with cake pops, they are exactly as they sound - a cake lollipop - cake on a stick. Isn't everything more fun when it's on a stick?!? Bakerella makes the cutest most elaborate cake pops. I can't wait to get her book which will be coming out soon! Since this was my first time, I thought I'd do the most basic - a round cake ball.
For a more detailed explanation on how to make them, you can check Bakerella's site. Here, I'll explain how I went about it.
First step is to bake a cake. I baked from scratch but you can definitely use a box mix. I like to bake from scratch because it's not as sweet as the box mix.

Once its completely cooled, put it in a bowl and break it up into small crumbs.
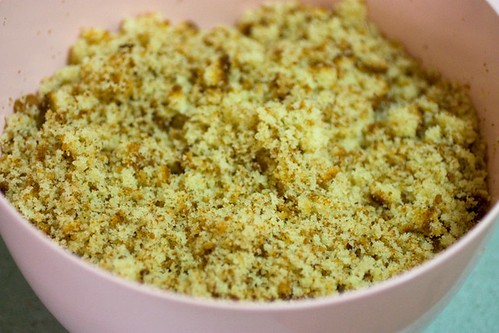
I also like to make my own buttercream icing, but again you can use the canned variety.

Mix everything all together and start forming balls and place them on a cookie sheet lined with either wax paper or parchment. Once they are all done, pop them either in the fridge or freezer. You want them to set up and get firmer.
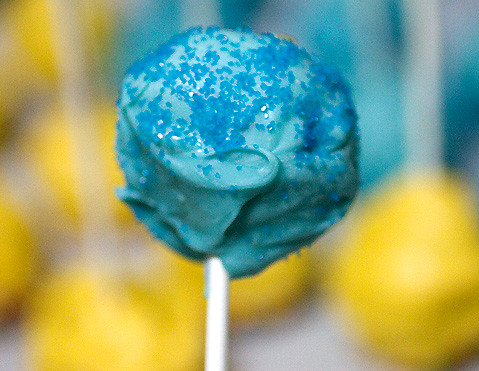
I thought it would be fun to do a rainbow of cake pops so I got candy melts from Michael's in purple, blue, yellow, orange and red. I also got the lollipop sticks there as well.
I was too lazy to go back to Bakerella's site to check on the directions so I'm not sure if you're supposed to put the lollipop stick in before or after you freeze them. I did it after, but I'm thinking it may be before.
So, I worked one color at a time. I put the candy melts in a microwave safe bowl and nuked it in about 10 second intervals, stirring each time and making sure it was completely melted. Then you take the tip of the lollipop stick, dip it in the melted candy and then stick it about halfway through the cake ball. When the candy hardens, it helps to keep the stick in the cake ball.
Once the sticks are all set (this only takes a few seconds), you start dipping! You want to get as smooth and as even a coat as possible and make sure the whole cake ball is covered. (easier said than done) You can use a Styrofoam block to inset the lollipop in to help while it dries.

If you want to put sprinkles or any other topping on, you want to do it right after you dip - while it is still wet.
Some of them I used rainbow sprinkles,

others I used colored sanding sugar
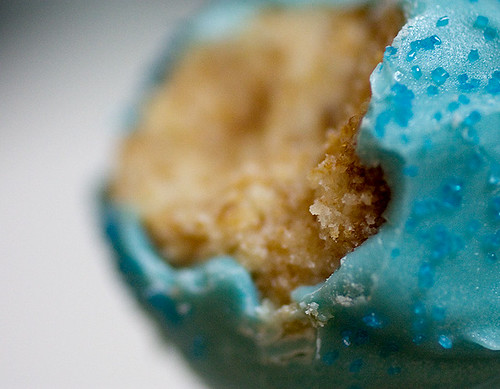
No one would believe that there is actually cake in the middle.
But there is....
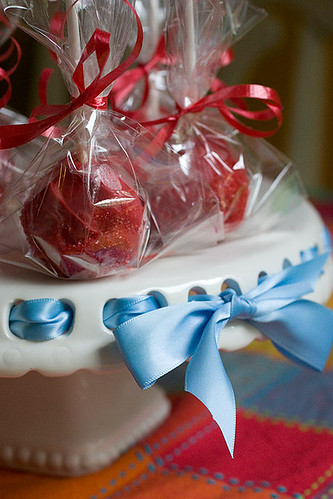
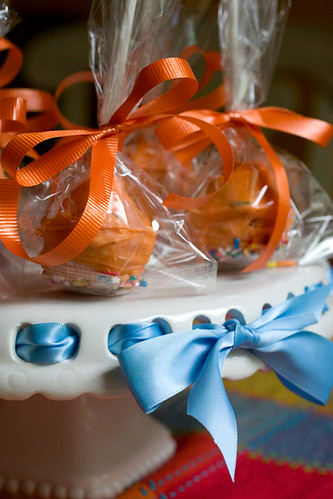
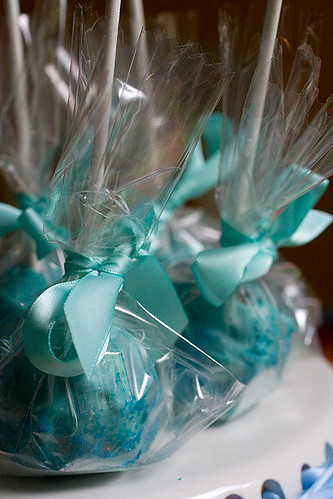
I couldn't just leave it like that. Being the packaging freak that I am, I had to dress them up a bit. I put each pop into a clear cello bag and tied with a coordinating ribbon.
Red
Orange
Yellow
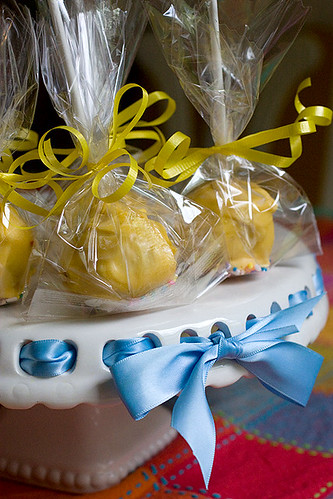
Blue
Purple
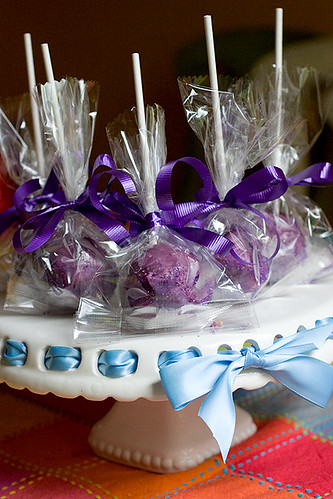
I think I like the blue one the best. For that one I used satin ribbon. It really dressed it up. I think these would be great at baby showers, bridal showers, or even used as party favors.

My daughter, her teacher and the whole class was happy. There were even some parents there and they seemed to like them also. Who could say no to a sweet treat in the middle of the day?
Have you ever tried to make these? If not, give it a try and let me know how it goes.


3 comments:
I have not tried this.. but it looks fairly simple.. something I can probably do!! Super cute idea!
Cake pops are totally fun, and I agree--great to take to class!
Those rainbow cake pops look delicious and festive.
Post a Comment